All-Butter vs. Shortening Puff Pastry: Which Delivers the Ultimate Cheese Danish?
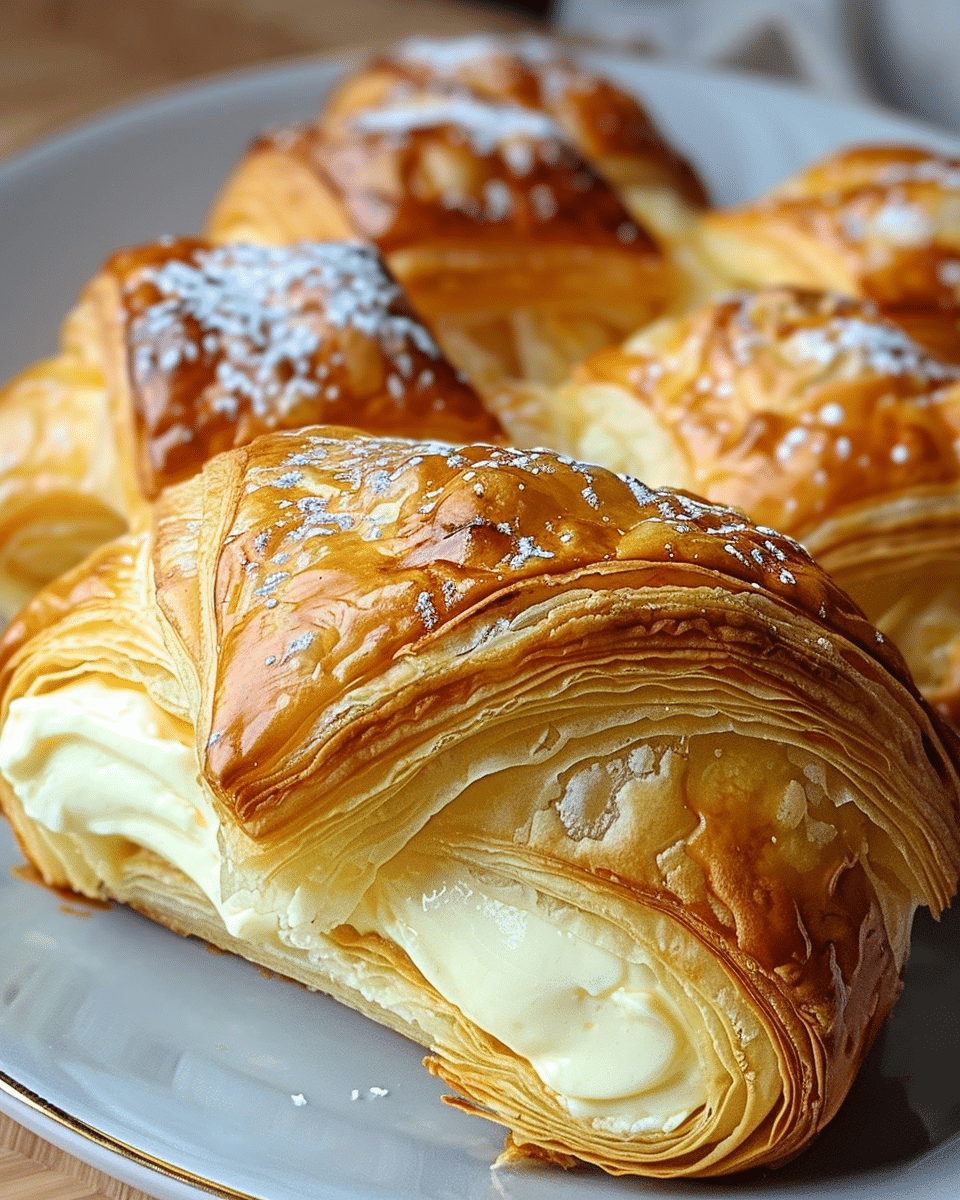
When breakfast pastries come out of the oven, the fat folded into the lamination determines whether you get an airy, crackling crust or a waxy disappointment. A recent comparative evaluation highlighted in an Allrecipes Report tested five prominent store-bought puff pastry brands and found that only a single brand delivered truly exceptional height and flakiness. That finding mirrors a longstanding division in home bakeries: the quiet tug-of-war between all-butter puff pastry and industrial shortening-based dough.
A traditional cheese danish relies on a balance between a rich, tangy sweetened cream cheese center and an expansive, featherlight border. Because true danish dough requires yeast fermentation alongside complex laminating folds, home cooks regularly rely on frozen puff pastry sheets as an efficient shortcut. Yet grabbing whatever box sits on your grocer’s freezer shelf introduces variables that dictate crispness, browning, and structural integrity under a heavy cream cheese filling.
📌 Key Takeaways:
- The Fat Profile: All-butter puff pastry offers superior flavor and a melting mouthfeel, while vegetable shortening yields higher structural lift at the cost of richness.
- Moisture Management: Pairing dense sweetened cream cheese with delicate dough requires aggressive parchment paper baking and high heat to prevent soggy bottoms.
- Handling Protocol: Proper thawing inside the refrigerator prevents butter layers from fracturing, ensuring flaky pastry layers puff evenly during baking.
The Science of Lamination: Butter vs. Vegetable Shortening
Puff pastry relies on physical aeration rather than chemical leaveners like baking powder or biological agents like yeast. Hundreds of micro-thin layers of fat sit insulated between sheets of flour dough. When heat strikes the pan, water inside the dough and fat turns to steam. That steam expands, forcing the pastry sheets apart before the gluten proteins firm up into delicate walls.
Butter brings roughly 16% to 18% water content alongside milk solids that caramelize during baking. This natural moisture produces a sudden burst of steam while the milk solids toast, imparting a rounded, nutty aroma. Butter also has a narrow plasticity window. It melts at 90°F to 95°F, right around human body temperature, which gives pastries their signature melt-in-the-mouth texture.
Vegetable shortening behaves differently. Formulated from hydrogenated or fractionated plant oils, commercial shortening contains zero water and has a melting point between 115°F and 120°F. Because shortening stays solid at higher temperatures, the dough holds its shape longer in the oven, allowing trapped air to expand higher before the fat melts. The trade-off is visceral. Shortening coats the palate with a lingering, waxy film because human mouth temperature cannot melt the residual fat.
Head-to-Head Testing: Rise, Flavor, and Structural Stability
To evaluate how these fats perform under practical conditions, we tested standard market sheets beneath identical portions of sweetened cream cheese filling. Each pastry square was docked in the center, chilled to 40°F, brushed around the rim with a beaten egg wash, and baked at 400°F over double-lined baking sheets.
| Performance Metric | All-Butter Pastry (e.g., Dufour) | Shortening-Based Pastry (e.g., Pepperidge Farm) |
|---|---|---|
| Vertical Lift / Edge Rise | Moderate, uniform rise (1.2, 1.5 inches) | Dramatic vertical expansion (1.8, 2.3 inches) |
| Base Crust Rigidity | Crisp, snap-crackly; tender under filling | Dry, papery, exceptionally stiff base |
| Flavor Profile | Pronounced butter richness, toasted hazelnut notes | Neutral to mild; faint starch flavor |
| Mouthfeel & Texture | Shatters instantly; clean, quick melt on palate | Crisp exterior; leaves light waxy coating |
| Average Retail Cost (2026) | $9.99, $13.49 per 14 oz pack | $4.79, $6.29 per 17.3 oz pack |
The shortening dough won on raw height. It ballooned upward, forming an exaggerated perimeter that framed the dairy center like a high-walled trench. However, the sensory contrast told another story. The cream cheese filling, made with sugar, pure vanilla, egg yolk, and cream cheese, carries heavy dairy fats. Paired with shortening pastry, the bite felt discordant, a rich topping colliding with dry, flavorless crunch. The all-butter alternative provided harmony, allowing the dairy notes in the dough to amplify the sweetened cheese.
Managing Moisture: Soggy Bottom Prevention
The biggest hurdle in assembling a bakery-quality cheese danish at home is base saturation. Cream cheese releases moisture rapidly as its sugar content liquefies under heat. If that liquid seeps into unbaked dough layers before they seal, the bottom crust collapses into a gummy, underbaked pad.
A few precise technical steps completely prevent this issue:
Dock the dough deliberately. Use the tines of a fork to prick the central region where the cheese will rest. This prevents trapped steam from bowing the center upward, keeping the dairy filling securely anchored. Leave the 0.5-inch border completely untouched so it can rise uninhibited.
Par-chilling stabilizes your fats. After cutting and shaping your pastry, chill the assembled tarts in the refrigerator for 15 to 20 minutes before baking. Launching cold fat into a hot oven induces thermal shock, yielding instantaneous steam rather than gradual, greasy melting.
Baking surfaces matter as much as heat. Skip nonstick spray or bare baking sheets. Always opt for parchment paper baking over a heavy, rimless aluminum half-sheet pan. For stubborn ovens, preheat a heavy baking stone or an inverted sheet pan on the lowest rack, sliding your parchment-lined pastry tray directly on top to flash-bake the bottom crust instantly.

Thawing and Handling Protocols for Frozen Pastry Sheets
Rushing the thaw ruins more pastry sheets than improper oven temperatures. When frozen dough bends before the fat softens, the laminated butter sheets snap into jagged shards. When those fractures occur, steam vents out prematurely through internal cracks rather than pushing individual layers upward.
The gold standard involves thawing frozen puff pastry inside the refrigerator for approximately 3 to 4 hours, or overnight. The dough should feel flexible and cold, bending around your finger without resistance or cracking. If kitchen time is limited, room-temperature thawing should never exceed 30 to 40 minutes. As soon as the pastry unrolls smoothly, transfer it back to refrigeration if your fillings are not yet measured and assembled.
Flour your surface lightly. Excessive bench flour dries out the outer sheets and turns crusts pale gray. If the dough warms up and feels tacky during shaping, stop immediately and return it to the freezer for 5 minutes. Cold dough is non-negotiable for clean cuts.
Finishing Touches: The Mechanics of the Egg Wash Technique
A glossy, burnished border transforms a rustic pastry into a display-case centerpiece. Egg wash serves two roles: it bonds overlapping dough corners together and drives surface Maillard browning via proteins and reducing sugars.
Application requires precision. Whisk one egg yolk with 1 teaspoon of heavy cream or cold water and a microscopic pinch of fine salt. The salt partially breaks down egg proteins, creating an even, liquid glaze without stringy clumps. Use a small, natural-bristle pastry brush to paint only the top rim of the danish borders.
Keep the glaze off the cut edges. If beaten egg drips down the side profiles, it glues the microscopic dough leaves together. That liquid seam acts like a seal, preventing individual layers from expanding. The result is an uneven, tilted pastry where one side climbs dramatically while the glued flank stays flattened.
Frequently Asked Questions (FAQ)
Q1: Can I use rough puff (blitz puff pastry) instead of commercial sheets for cheese danish?
A1: Yes. Homemade rough puff yields exceptional tenderness and deep butter flavor. While it provides slightly less uniform height than industrially sheeted dough, its flavor easily outperforms commercial shortening options.
Q2: Why did my cheese filling crack and dry out during the bake?
A2: Overbaking and excess egg white in the filling cause cracking. Use only egg yolks in your cream cheese mixture, and pull the pastries when the edges are deep golden brown while the cheese center still displays a slight, glossy wobble.
Q3: How do I store and reheat leftover puff pastry cheese danishes?
A3: Keep baked pastries in an airtight container lined with paper towels in the refrigerator for up to 3 days. Never microwave them, which softens the lamination into mush. Crisp them in a 350°F toaster oven for 5 to 7 minutes to restore layer crunch.
Choosing the Right Fat for Your Danish
Baking decisions come down to sensory intent. If an upcoming event demands towering, architectural edges that hold their shape indefinitely across a buffet table, shortening-based puff pastry offers unbeatable physical stability at half the retail expense.
When flavor, mouthfeel, and authentic European pastry tradition guide your kitchen, all-butter pastry remains the definitive choice. The clean melt of natural dairy fat harmonizes effortlessly with tart cream cheese, proving that real butter creates an unmistakably superior cheese danish.
