Mastering the Skeleton Hand Illusion: The Complete Beginner-to-Pro Painting Guide

Painting a believable skeletal hand directly onto living skin requires more than slapping white streaks over dark skin. It demands an understanding of real biomechanics, light displacement, and precise optical deception. As anatomical artist and researcher Said Bouftass highlighted during his summer workshops on human morphology reported by the moabsunnews.com Report, our visual perception of hands depends entirely on how surface forms articulate over bone. That biological truth is precisely what makes optical illusion makeup work.
Transforming flat epidermis into a hyper-realistic, three-dimensional skeletal form means working with the natural architecture of flesh, fat pads, and tendons rather than fighting against them. Whether creating an avant-garde look for editorial photography or upgrading a seasonal Halloween hand painting project, mastering the interplay of dense bone highlights, deep socket shadows, and empty space turns a simple brush stroke into a startling trick of the eye.
📌 Key Takeaways:
- Anatomical Precision: Aligning paint lines with underlying tendons ensures the illusion moves naturally when your fingers flex.
- Form Through Contrast: Convincing bone relief depends on deep negative space, harsh drop shadows, and delicate off-white highlights.
- Skin Safety First: Water-activated cosmetic body paints offer high-contrast coverage without cracking, drying out skin, or causing contact dermatitis.
The Biomechanical Foundation: Anatomical Hand Mapping
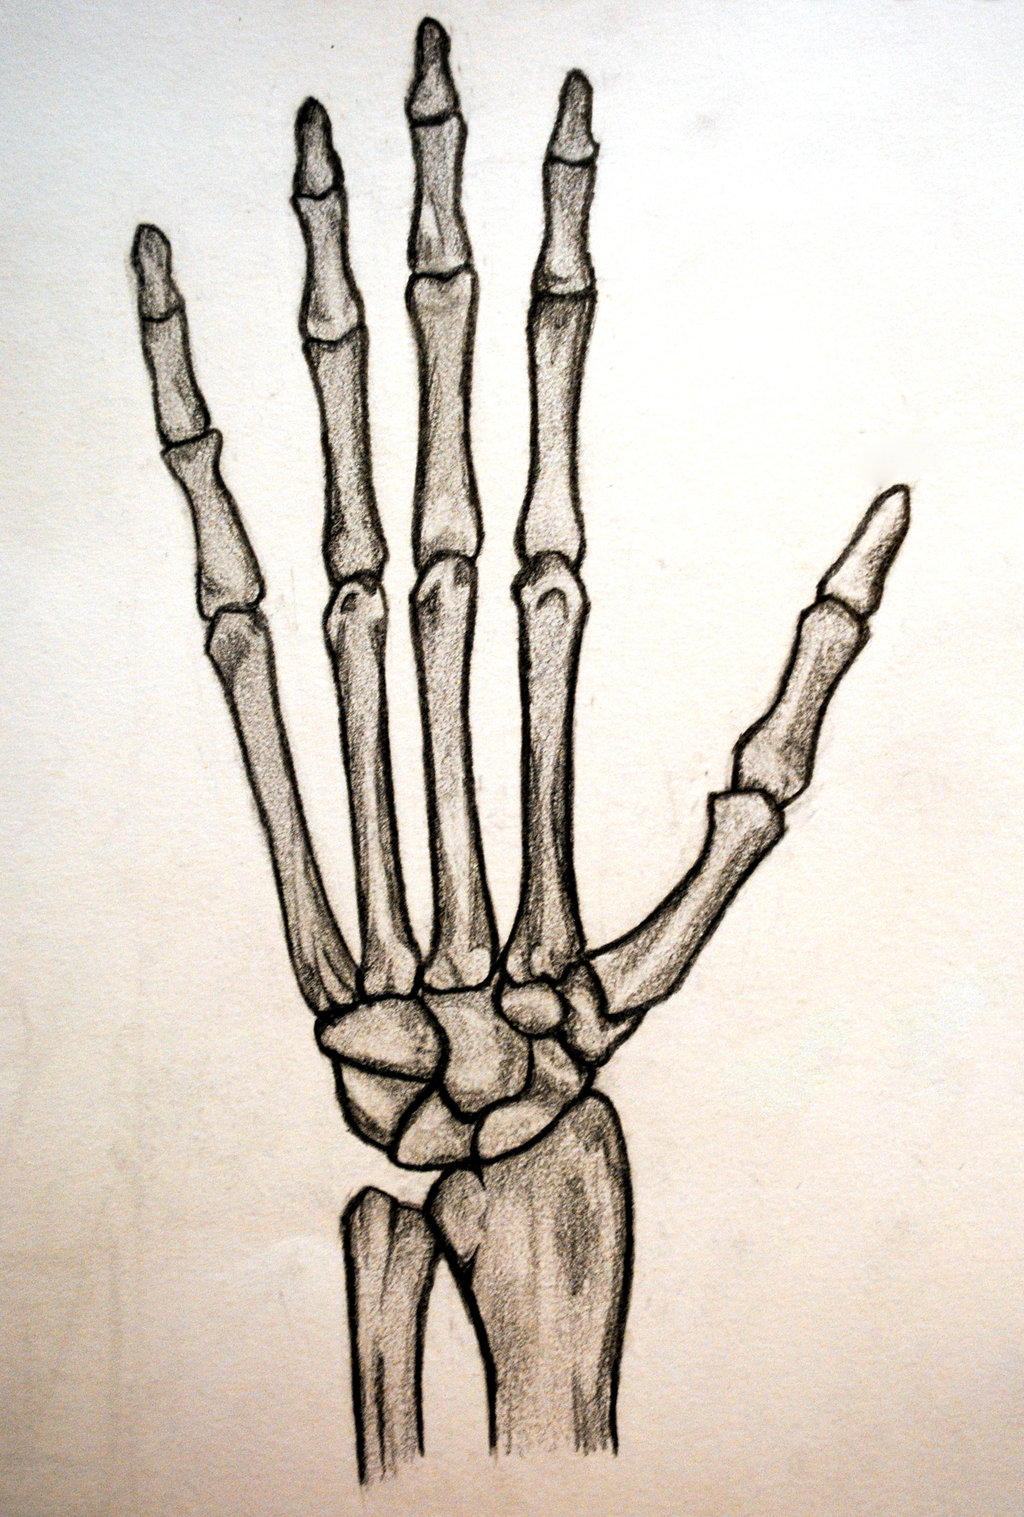
The human hand contains 27 distinct bones. When artists attempt a skeletal design and end up with something that looks cartoonish, the error usually tracks back to anatomy rather than brush control. They paint straight, uniform white sticks down each finger. Natural hands do not work that way.
To anchor a convincing design, you must map the primary structures:
- The Phalanges: Fourteen separate bones across four fingers and one thumb. Each finger contains three segments (proximal, intermediate, and distal), while the thumb contains only two.
- The Metacarpals: Five long bones that span the back of your hand, radiating outward from the wrist toward each knuckle.
- The Carpals: A compact cluster of eight small, irregular bones forming the wrist joint.
Every long bone curves slightly. The shaft narrows inward while the heads, the articulating knuckles and joints, flare outward to accommodate cartilage and ligaments. By palpating your own hand before applying pigment, you can mark the exact anatomical hand mapping landmarks. Press gently along the dorsal surface to feel the distinct ridges of the metacarpals. When you make a fist, notice how the knuckles emerge not as rounded spheres, but as squared, uneven condyles.
Aligning paint strokes directly over your actual hand tendon alignment produces dynamic realism. When you open and close your hand, the painted bones stretch and fold in synchronization with living biomechanics, instantly selling the optical illusion makeup to anyone watching.
Pigment Chemistry and Skin Preparation Protocols
Oil-based paints and craft acrylics have no place on skin. Acrylic paint turns brittle, snaps across joint creases, and can trigger severe allergic contact dermatitis. Grease paint, while classic in stage production, smudges instantly across high-friction hand zones and refuses to set without heavy powdering that ruins crisp line work.
Professional body artists rely on water-activated, cosmetic-grade face and body paints. These glycerin- or wax-based pigments dry to a touch-proof, matte finish, flex over micro-wrinkles, and wash away cleanly with warm water and soap.
Skin preparation directly determines whether your piece lasts 30 minutes or surviving a full 8-hour event. Begin by stripping natural sebum and hand lotion from the epidermis using an alcohol-free cleansing wipe or gentle micellar solution. Hydrate dry cuticles with a non-greasy balm at least one hour beforehand, giving it time to absorb completely. For maximum longevity, apply an invisible layer of barrier spray across the dorsal hand, creating an inert surface that prevents sweat from degrading your line work.
Negative Space Illusion: Cutting Away Living Flesh
The secret to a 3D bone drawing technique lies not in the white paint, but in the black. Our brains interpret deep, light-absorbing blacks as recessed voids. By applying an intensely pigmented, matte black paint into the spaces between bones, you create a negative space illusion that visually erases flesh.
Start by roughing out the silhouette of your metacarpal bones using an ultra-fine water-soluble pencil or a dilute gray wash. Next, flood the surrounding spaces, the soft tissue valleys between the bones, with concentrated matte black body paint. Carry this black pigment completely down the sides of the fingers and around the base of the wrist.
| Pigment / Tool Layer | Structural Objective | Application Technique |
|---|---|---|
| Matte Carbon Black | Recesses flesh; generates negative space illusion | Flat synthetic brush; full opacity across intermetacarpal zones |
| Neutral Gray / Taupe | Soft drop shadows; socket depth; joint articulation | Damp filbert brush; gentle feathering inward from black borders |
| Bone / Off-White | Primary bone shaft body; base cortical layer | Round detail brush; centered along bone axes |
| Pure Titanium White | Focal highlights; specular reflection on condyles | Micro-liner brush; applied sparingly to highest physical crests |
When working the sides of your fingers, bring the black paint slightly inward past the physical edge of the finger. This slight narrowing tricks the viewer's eye into perceiving slender phalanges bone structure instead of fleshy digits. Keep your hand completely flat and relaxed while laying in these structural shadows to prevent warping your perspective lines.
Step-by-Step Shading Knuckles and Joints for Volumetric Depth
Pure white paint sitting directly beside flat black looks like a graphic novel illustration, not a real skeletal specimen. Real skeleton hand drawing relies on delicate transitions, subtle gradients that suggest cylindrical volume and weathered calcified tissue.
- Lay the Base Bone Tone: Avoid stark titanium white for the base layer. Mix an organic ivory or off-white tone by blending white with a microscopic speck of raw umber or ochre. Fill in the rough shapes of the metacarpals and phalanges, leaving a distinct gap at every joint junction.
- Form the Articulating Condyles: Knuckles are not straight lines. Paint the distal end of each bone segment with two distinct rounded lobes (condyles). In the center of the knuckle joint, paint a delicate, irregular dark gap where the joint capsule sits.
- Blend Drop Shadows: Pick up a medium neutral gray using a damp detail brush. Soften the harsh borders where the ivory bone touches the black negative space. Feather this shadow inward along the lateral sides of the bone shafts, leaving the central ridge bright.
- Carve the Joint Depressions: Deepen the small hollows immediately above and below each knuckle with a charcoal-gray wash. This creates an optical pocket, making the painted joint appear to bulge outward toward the viewer.
Work methodically from wrist to fingertip. Keep a dry blending brush nearby to buff out harsh edges before water-based paints fully set. Soft, smokey transitions convey the curved surface of living tissue, turning flat paint into tangible, tactile form.
Lighting, Specular Highlights, and Movement Realism
Convincing trompe l'œil art requires an uncompromising commitment to a single, consistent light source. Decide early whether your imagined key light originates from above, the left, or the right.
If your light originates from the top-left, every single bone segment must feature:
- A crisp, bright highlight running along its upper-left shoulder.
- A soft ambient transition across its center.
- A dark core shadow along its lower-right boundary.
- A distinct cast shadow projected onto the recess beneath it.
Reserve pure, unmixed titanium white solely for the highest specular highlights. Touch tiny dots of pure white to the very crest of the knuckle condyles, the center of the wrist carpals, and the longitudinal ridges of the metacarpals. These precise points of bright reflection signal to the human brain that the surface is smooth, hard, and elevated above the surrounding shadows.
Once dry, test your work under diverse lighting conditions. Flex your fingers slowly. If your bone shafts warp unnaturally, adjust the width of your black negative margins to preserve the illusion across varied hand gestures.
Frequently Asked Questions (FAQ)
Q1: What is the safest paint to use for hand painting?
A1: Always select FDA-compliant, water-activated cosmetic body paints or professional alcohol-activated makeup palettes. Never use craft acrylics, gouache, permanent markers, or industrial paints, as these chemicals can cause chemical burns, dermatitis, and systemic toxicity when absorbed through skin pores.
Q2: How can I prevent the painted design from cracking when I bend my fingers?
A2: Cracking occurs when paint is applied too thickly over joint creases. Apply thin, buildable layers of glycerin- or wax-based makeup rather than a single heavy coat. Lightly flex your knuckles halfway through the drying process to prevent the pigment from cementing across deep skin folds.
Q3: How do I seal the skeleton hand design so it lasts through a party or photo shoot?
A3: After the paint dries completely, mist the entire hand with a high-performance makeup setting spray or alcohol-based barrier spray. Hold the aerosol roughly 10 to 12 inches away and apply two light passes. Avoid submerging the hand in water or applying friction to the palms.
The Evolution of Anatomical Body Art
Creating a convincing skeletal hand on living flesh sits at the intersection of biological science and visual art. As advanced robotic hands developed at institutions like the University of Houston showcase our expanding technical grasp of finger mobility and joint linkages, artists gain even richer structural models to draw from. The craft rewards precision. By respecting the underlying bones, deploying controlled negative space, and handling light with discipline, you produce more than a seasonal costume trick, you create an astonishing optical transformation that turns living skin into a striking biological canvas.


