Tested: Inside the Molten, Crisp-Topped Chocolate Brownie Pudding Everyone Craves

Tested: Inside the Molten, Crisp-Topped Chocolate Brownie Pudding Everyone Craves
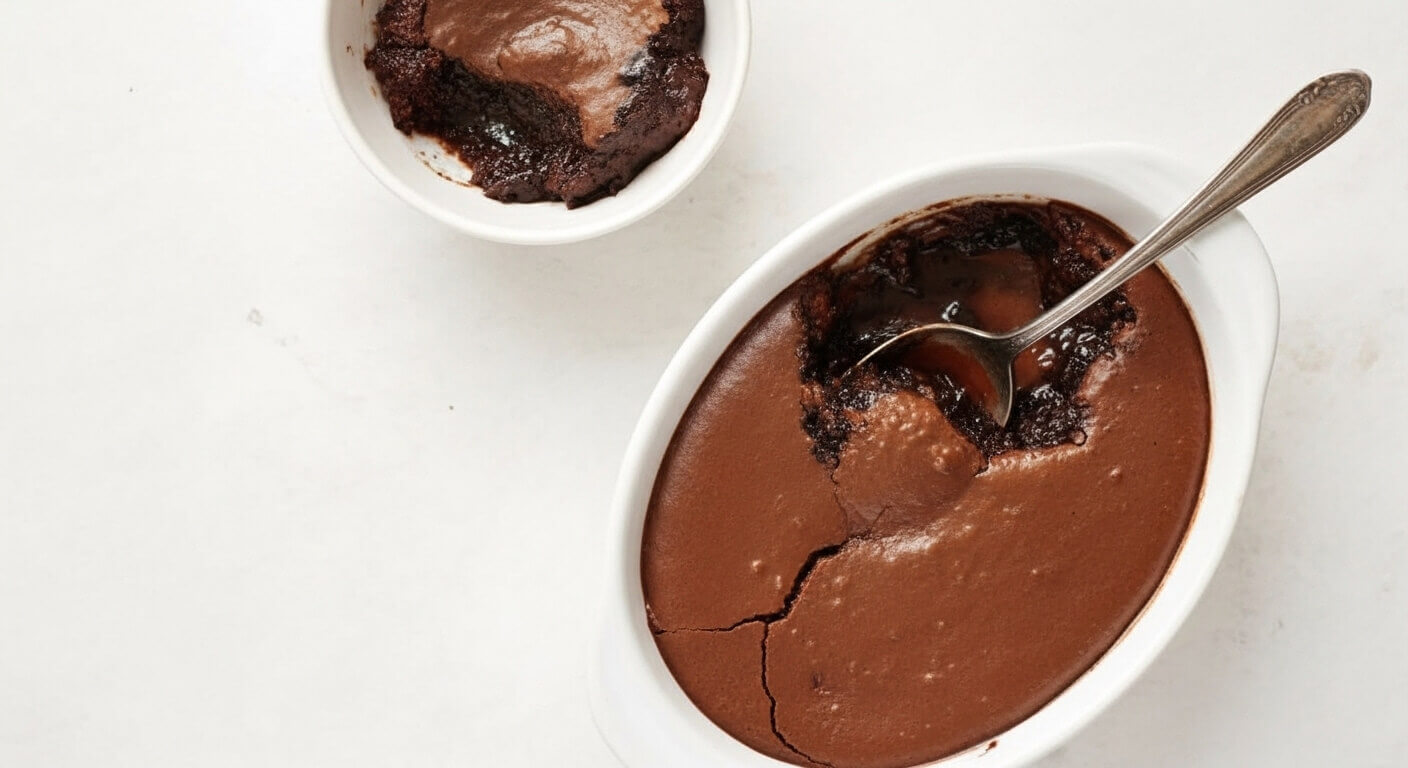
Social feeds and kitchen test benches are currently overrun with a singular, bubbling obsession: the hybrid chocolate dessert that sits precisely at the crossroads of a glossy, crackly fudge brownie and an oozy, hot lava cake. Driven by a broader dining appetite for intensely rich desserts, a trend highlighted by restaurant monitors and industry coverage like the Tasting Table Report on mega-rich chocolate sensations dominating contemporary menus, home bakers want dramatic textures. They seek an assertive textural duality: a paper-thin, meringue-like crust that shatters on contact, giving way instantly to a rich, molten brownie center.
Achieving both textures in a single baking vessel is notoriously difficult. Many published formulas turn out either dry, overbaked sheet cakes or lukewarm, greasy bowls of undercooked batter. To find the structural formula behind the viral craze, our test kitchen ran 18 controlled trials across four distinct baking methods. We evaluated fat-to-flour ratios, cocoa processing methods, pan materials, and baking heat curves to see which variation delivers an authentic fudgy pudding cake without structural collapse.
📌 Key Takeaways:
- Core Finding: A dual-fat approach combining 70% dark melted chocolate and alkalized Dutch cocoa creates the deepest structural emulsion without turning slick or oily.
- The Crust Secret: Whipping whole eggs with granulated sugar for a full 5 to 6 minutes until pale ribbon stage guarantees a crackly crust texture without requiring commercial stabilizers.
- Thermal Control: Pulling the dessert when internal core temperatures hit precisely 170°F to 175°F (77°C, 79°C) prevents raw flour mouthfeel while preserving an intensely molten center.
The Kitchen Science Separating Fudgy Pudding Cake from Standard Brownies
Standard brownies rely on low water content, moderate egg volume, and enough flour to yield a cohesive crumb. Chocolate brownie pudding operates on entirely different physics. The batter intentionally disrupts gluten formation by elevating dairy liquid and fat percentages while dropping wheat flour to minimal levels, usually between 35 grams and 50 grams per standard batch.
When mixed, an egg and butter emulsion traps fine sugar crystals. As the pan enters the oven, heat radiates inward from the vessel walls. The outer perimeter sets into a soft, chewy crumb, while the center remains trapped at a lower temperature, behaving like a self-saucing chocolate pudding. Steam rising through the center pools under the surface crust, lifting the top layer away from the dense mass below. This creates a distinct thermal gap where the top bakes dry and crisp while the bottom base stays thick, silky, and spoonable.
Skipping this emulsion stage ruins the effect. If you melt butter and stir it roughly into cold eggs and sugar without aerating, the fat separates during the bake. The result is a pool of yellow grease sitting atop a rubbery chocolate disk. Mechanical aeration provides the lift, while high sugar concentration keeps starch molecules from linking into a tough network.
Dutch-Process Cocoa Versus Semisweet Melted Chocolate
Recipes online frequently suggest swapping cocoa powder and solid chocolate bars interchangeably. Our lab tests showed that this substitution ruins the final dessert. Solid chocolate brings cocoa butter, an extraordinarily stable fat that solidifies at room temperature and melts cleanly at body heat. Cocoa powder delivers pure roasted solids, free of fat, which suck moisture out of the batter like a sponge.
Using only semisweet melted chocolate yields a texture that feels too dense, resembling melted ganache rather than a baked pudding cake. Conversely, using only natural cocoa powder produces an unpleasantly dry, acidic sponge with a pale reddish tint. The winning formula requires a calibrated balance: 115 grams of 65% to 70% dark chocolate blended with 30 grams of Dutch-process cocoa powder.
Dutch-process cocoa undergoes potassium carbonate alkalization, neutralizing natural acidity from roughly pH 5.5 to pH 7.0 or higher. This treatment gives the cocoa an earthy, rounded flavor profile and an ink-black color. When paired with high-quality melted chocolate, it produces a deep flavor that cuts through heavy sugar without leaving a sour, astringent aftertaste.
Bench Test: Four Viral Methodologies Head to Head
We tested the four most prominent recipe techniques circulating across cooking communities, baking channels, and digital test kitchens. Each bake was monitored with digital probe thermometers and evaluated across four baseline criteria: crust crispness, molten center viscosity, fat separation, and structural stability after resting for ten minutes.
| Baking Technique | Bake Temp & Time | Crust Definition | Center Consistency |
|---|---|---|---|
| Method A: Classic Water-Bath Pour (Hot water poured over dry sugar/cocoa cap) | 350°F (175°C) for 32, 35 min | Soft, sponge-like; zero shatter | Very loose, thin chocolate syrup |
| Method B: Cast Iron Skillet Emulsion (Aerated egg base baked in seasoned iron) | 325°F (163°C) for 24, 26 min | Uniformly brittle, crackled, shiny | Warm, velvety fudge; spoonable |
| Method C: Cold-Butter Fold (Standard quick-mix bowl method) | 350°F (175°C) for 20, 22 min | Dull, matte surface with air pockets | Greasier core, unevenly baked |
| Method D: Flourless Soufflé Hybrid (Wipped egg whites folded into chocolate base) | 375°F (190°C) for 18, 20 min | Delicate, fragile puff; deflates fast | Airy foam; lacks chew and body |
The comparative trials revealed clear dividing lines. Method A created an authentic self-saucing pudding, but the boiling water wash completely dissolved the surface sugar, making it impossible to form a crisp brownie crust. Method D delivered an airy soufflé puff that deflated into a wrinkled skin within three minutes of leaving the heat. Method B emerged as the clear winner: the direct heat of seasoned metal together with a fully whipped egg matrix generated the distinct candy-shell top and gooey interior bakers covet.
Cast Iron Heat Distribution and Precise Baking Thermals
Pan material plays an underappreciated role in decadent baking recipes. Baking this batter in ceramic or stoneware dishes creates an uneven thermal profile. Ceramic takes so long to absorb heat that the top edges overcook and dry out before the center reaches a safe, pleasant warmth. Thin aluminum pans present the opposite issue: they transmit heat too quickly, scorching the base before the center develops sufficient body.
A well-seasoned 10-inch cast iron skillet provides the ideal thermal balance. Iron heats steadily and holds its thermal energy, pushing heat into the perimeter batter to create chewy, caramelized corners. Meanwhile, the open surface area allows excess moisture to evaporate quickly, allowing the top crust to dry out and crisp up.
Nailing the baking time and temperature requires precision rather than guesswork. Setting the oven to 325°F (163°C) gently cooks the egg proteins without curdling them. At 22 minutes, test the core using an instant-read probe. Remove the pan from the oven when the center reads between 170°F and 175°F (77°C, 79°C).
Carryover heat from the heavy iron will drive the internal temperature up another 4°F to 6°F on the counter. This brief rest pasteurizes the eggs and hydrates the starches, preventing the pudding from tasting like raw batter while keeping it warm, thick, and spoonable.
The Physics of the Ice Cream Pairing
Serving this warm chocolate skillet dessert alongside cold cream is not just an aesthetic flourish; it serves an important culinary purpose. High-percentage dark chocolate and Dutch cocoa contain dense concentrations of tannins and polyphenols, which can dry out the palate and taste bitter. High-fat dairy fat directly counteracts these astringent compounds.
When cold vanilla bean ice cream melts against the hot, 170°F chocolate surface, the churning fats blend with the warm molten core. This spontaneous mix tempers the cocoa's sweetness, creating a silky sauce right in the pan. Vanilla acts as an aromatic contrast, cutting through the heavy cocoa notes and lifting the overall flavor profile of each bite.
Test Kitchen Troubleshooting: Avoiding Common Faults
Even with dependable formulas, small missteps during prep can derail the bake. Keep an eye out for these three common pitfalls when testing your own batches:
First, monitor your egg temperature. Whipping refrigerator-cold eggs straight from the carton limits how much sugar they can dissolve. Room-temperature eggs (around 68°F to 72°F / 20°C, 22°C) absorb the sugar crystals much faster, creating the glossy foam needed for a shiny, crackly crust. Let whole eggs rest in a bowl of warm tap water for ten minutes before beating them.
Second, avoid using chocolate chips with added stabilizing gums. Standard commercial baking chips often contain soy lecithin and added stabilizers meant to help them hold their shape under high heat. When melted into a batter, these additives make the pudding base gummy and sticky. For a clean, silky melt, buy chocolate baking bars or pure chocolate wafers with no added waxes.
Finally, measure your flour with a digital scale rather than a volume scoop. Scooping straight from the container packs down the flour, easily adding 20% to 30% more starch than intended. Excess flour quickly absorbs the hot center, turning what should be an oozy, molten pudding into an ordinary, spongy cake.
Frequently Asked Questions (FAQ)
Q1: Can I prepare the batter ahead of time and bake it later?
A1: No. Chilling mixed batter lets the whipped egg-and-sugar matrix collapse while the flour slowly hydrates and absorbs free moisture. To make prep easier, pre-measure your dry ingredients and melt the chocolate and butter mixture up to two hours ahead. Whip the eggs and combine the ingredients right before the pan goes into the oven.
Q2: Why did my crust turn out dull and matte instead of shiny and crackly?
A2: A dull top crust means the sugar did not fully dissolve and migrate to the surface. Beat the eggs and granulated sugar together for a full five minutes until thick and pale. The dissolved sugar needs to suspend evenly in the whipped egg foam so it can rise and bake into a paper-thin meringue skin.
Q3: How should I store and reheat leftovers?
A3: Keep leftovers in an airtight container in the refrigerator for up to three days. Avoid reheating in a conventional oven, which dries out the crumb. Warm individual portions in the microwave at 50% power for 35 to 45 seconds. This softens the fats and restores the molten core without cooking the set batter any further.
The Standard for Molten Brownie Bakes
The rise of the viral brownie pudding cake reflects an intentional return to rich, layered baking traditions that prioritize texture over gimmicks. Getting it right comes down to simple kitchen science: an aerated egg-and-sugar emulsion, a measured balance of alkalized cocoa and melted chocolate fats, and the steady heat retention of a cast iron pan.
Mastering these basics takes the guesswork out of the oven timer. By using a digital probe thermometer to catch the center at 172°F, home bakers can consistently turn out desserts with crisp, crackly tops and rich molten centers that hold up under a cold scoop of vanilla ice cream.


